Tuesday, March 20, 2012

Niecy's Flaming Kitchen, the Tragedies and the Triumphs

My niece, who I talked about in Moving and a Grooving, recently moved into her first apartment.  She turned down a set of blue Le Creuset cookware because she hated the color [niecy loves orange], and she set her heart on a set of orange handled Rachel Ray cookware.  Her idiot mother bought the RR cookware for her against my advice.

That was one tragedy.  The next was when my sister bought said niece a plastic knife block with orange handled Rachel Ray knives.


I couldn't take it anymore.  The waste, the futility, the nonsense was overwhelming to a sensitive soul like mine.  I took over and bought Niecy this stacking look orange cookie jar from Ebay.  Now this is what I am talking about -- a good solid space saving investment, that matches the stacking canister set I bought her from Ebay perfectly.


Then I decided on Pyrex Autumn Harvest mixing bowls.  Another Ebay purchase.  What makes these bowls a hit are not the color, but that Pyrex makes good quality mixing bowls.


I suddenly remembered I had an old orange Rival crockpot, and thought, "This is perfect".  My lovely niece is not much of a cook, but she likes to try.


On Ebay, I discovered an orange Kitchenaid hand mixer.   And a hand mixer is useful even when she does need a good stand mixer.  And I will be there to help her with that at a later time.


On Etsy, I saw an orange Waring Blender.  It is a solid durable piece of equipment, not a patch on a Vita Mix, but useful.


I bought Niecy orange Tupperware plastic pitchers from Ebay and will buy matching tumblers first chance I get.  Just what a young mother needs.  No breakage to worry about.


I have seen kitchen towels, and incidentals were very inexpensive online.  Like tfis dishpan set off Ebay.


Although my niece's kitchen will be bright and colorful, it is not exactly the type of kitchen I had in mind.  But at least this stuff will get her started, and maybe someday, she will see the light.  I have hopes of her at least getting some great pieces of flame orange colored Le Creuset or Descoware!


Sunday, March 18, 2012

Onion Overload! Can You Have Too Many Onions?


Spring fever has hit my house and once again I think I have bitten off more than I can chew.

Apparently, I thought there was going to be a world crisis shortage of sweet onions this year and figured I'd better stock up ahead of time.  I bought twice as many onion sets as we could use for the vegetable garden this year.  I went ahead and rearranged the garden plan to accommodate the overload but Gosh!

But all is well, and I have got half of my motherlode of onions in the ground, along with all of my potatoes.  My pear tree, crabapple tree, and my two plum trees were planted today. 

The second half of the onion bonanza will go in on the first dry day we get along with, pole beans, and peas.  I need to plant my Nanking Bush Cherry hedge [25 bushes] along the driveway too!  Rain is expected for the next 3 days. 

As soon as they come into town, I'll buy my broccoli, cauliflower, and cabbage plants.  So far no store has got them in yet.  That day, I will get my collards, mustard, swiss chard, kale, turnips, beets, and lettuces in if at all possible.

Next chance I get, I will buy and plant 2 grapevines, set out my wild strawberry plants [temporarily planted in planters until I get a chance to plant them outside], and I need to plant more Shasta Daisies [from seed].

Then I will be able to rest until the middle of May or so when I put in the warm weather crops: okra, tomatoes, peppers, summer squash, corn, zucchini, cucumbers, and etc.  Man, the seed companies are once again making a killing off of me.


I have three new garden companions.  They are three children from 10 to 14 years old, two girls and a boy.  These children are truly fascinated by digging in the earth, and making things grow.  It is a pleasure to spend time with them and teach them how to get closer to God through gardening.  Their eager questions and their enthusiasm rejuvenates me.  I will have the children throughout the gardening season, and they can easily walk over since they only live about 3 blocks away.
I felt so happy and satisfied today, when I glanced up from my work and discovered that the little peach tree I planted two years ago has a few white blossoms on it.  It made all of my efforts seem worthwhile to see that tiny hint that one day an abundant harvest will come.  The tiny sprig looked like HOPE.


Saturday, March 17, 2012

I Hate Bambi and all his Deer Friends!


It looks sweet and innocent doesn't it?  But underneath that Bambi grace is a Monster!

I was visiting with my cousin Charlie, and I noticed that one of my roses was tumbling around the yard like a tumbleweed!  When we looked at my rose garden we noticed that a couple more roses were almost completely cut off at ground level. 

The mulched soil around the roses looked disturbed, and then the light came on inside my brain.  Deer had ravaged my roses!

I am so totally devastated that I can not bear to take pictures of the carnage.  Did I say...........I HATE DEER! 


The only good deer!

Should I, or Shouldn't I?


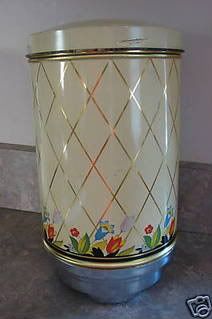
What is this thing?  I have seen in various places on the net it described as a wall mounted coffee dispenser, and a wall mounted flour dispenser.  And yeah, I bought one!  What AM I to do with it?


If I had my way, I would use it as a flour dispenser in my baking center.  But what do I know?

Tuesday, March 13, 2012

Custom Kitchen Crafting


My mom taught me how to sew on a White treadle sewing machine! I really loved that old machine.


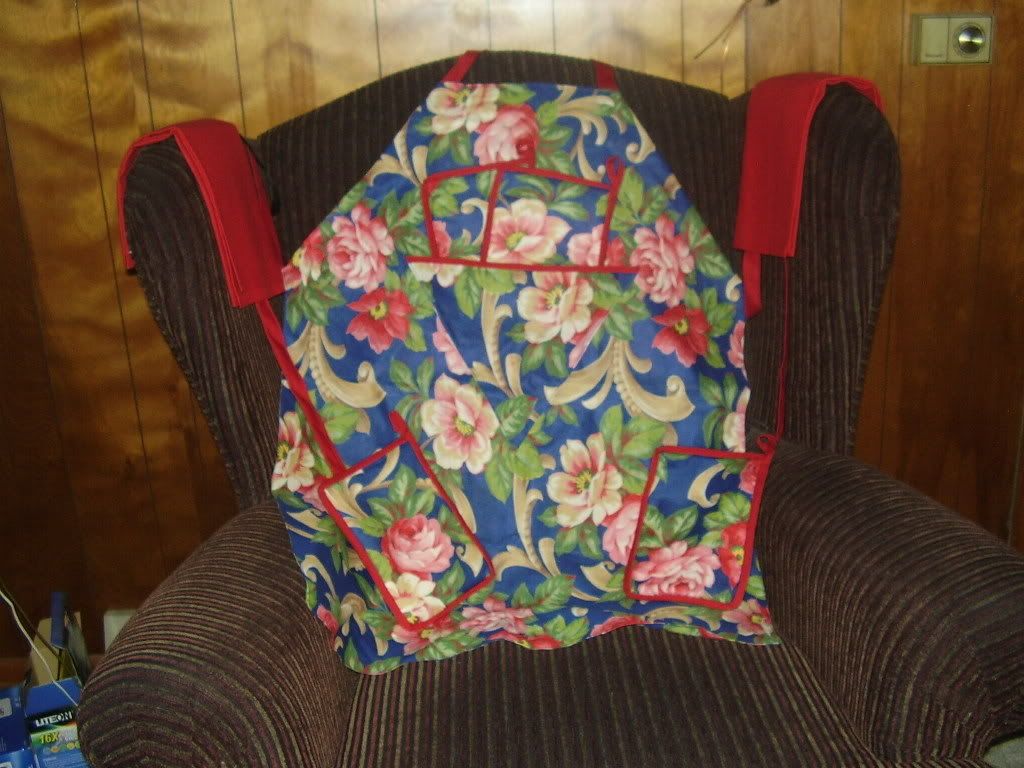
You make aprons, and I designed my own!  I made my own design both adjustable and reversible. One size fits everybody, tall short fat or skinny.  I sold some for fund raisers and gave some away as gifts along with matching potholders!


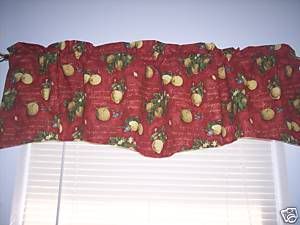
Sewing window valances and/or curtains is easy, calling for only a straight stitch and a little time on your part.


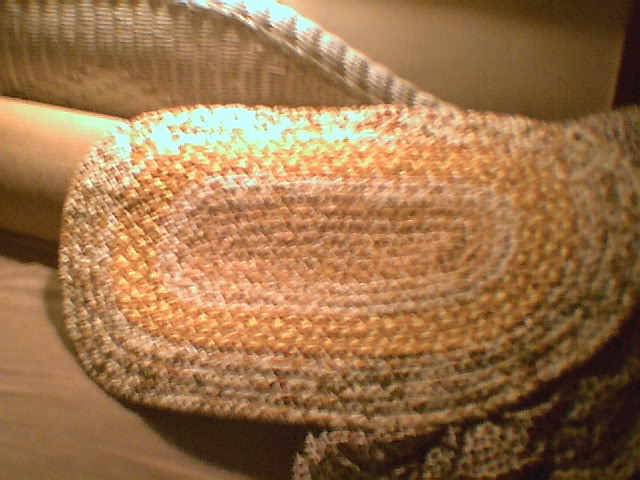
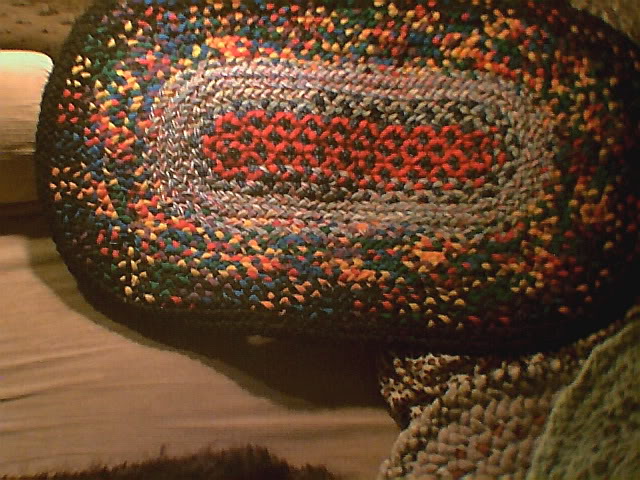
Making braided rugs is relaxing and a easy hobby to begin crafting.  There is little sewing to do, and you can be proud of your efforts.  An easy way to learn is to google ‘braided rag rug’ or ‘how to braid a rug’ to get ideas.  Here is a good place to start:  http://thecontrarianmom.com/2011/01/29/braided-rug-how-to-braid-your-own-rag-rug/

Below are some of my better efforts, and I have found that the process gets easier over time.


Sunday, March 11, 2012

No Dig, Ruth Stout, Raised Bed -- My Gardening Philsophy


I am not pro this or that, or anti this or that.  I am whole heartedly for whatever gardening method I can find that is:

1.  Easy on the gardener.
2.  Inexpensive to implement.
3.  Enriches the soil.
4.  Discourages weeds.
5.  Takes less time and effort.
6.  Grows healthy plants.

I decided on raised beds in the first place for all of these reasons.  I want to be able to sit on the side of the bed and be able to do much of my garden work without kneeling, bending over, and hurting my back.  The other benefits such as containing my hard won enriched soil are good reasons also. 

So far I have been able to get the old railroad ties I need to create the sides of my beds fairly cheaply.  I need more to raise the sides up to a comfortable sitting level as I can afford it. 

I also decided on Ruth Stout's permanent hay mulch, no-till garden.  Not having to have my garden tilled every year saves work and money.  Also the benefits of composting in place, which is the natural result of Ruth's mulch method are myriad.  The leaves and hay used as mulch rots over the course of time and becomes compost. 

Soil enrichment is made easy - not having to move tons of compost around, weed control, less watering, neat garden appearance,  no unsightly compost piles, etc. are all important to me.  All I have is a small light Mantis tiller, that I only use lightly to create seed beds. 

I am able to amend the soil by just laying the horse manure, alfalfa cubes, or other organic amendments right on top of the mulch.  That way, if the manure is a little fresh, it will not burn my vegetables.

The horse manure is free for the hauling, and the organic fertilizers are relatively cheap [$15 a 50lb bag for alfalfa cubes].  The leaves I get free from a landscaping friend, and there are lots of farmers around here who are willing to sell their spoiled hay to me cheaply.

At the end of the season it is easy to put the garden to bed for the winter by adding a few more inches of leaves over the garden detrius and putting hay on top to keep the leaves from blowing.

I came up with the idea of buying heavy woven wire cattle panels used with steel fence posts from my neighborhood farm store to create a permanent trellis down the middle of each garden bed.  This eliminates the need for tomato cages and putting together flimsy trellises for pole beans and peas.  The panels only cost $20 a bed, and the steel fence posts were found behind the garage.  They should last for many years without further effort or expense.

I did buy drip irrigation hoses to water my beds while conserving water.  They are far more efficient than overhead sprinkling systems.


The White House Garden Plan


Monday, March 5, 2012

Lazy Day Food Preparation Tips


Lazy Food Prep

I am sure there have been times when you wanted to put a meal together quickly, without a whole lot of prep work. Why go through all the trouble of washing peeling your onions and garlic; washing your celery, seeding your peppers, peeling your carrots, etc.?

I know I don’t. When they are on sale, or freshly picked from the garden, I do my prep work. On a day when all I have to do to prepare supper is to heat up some left overs, I will sit in front of the TV and peel tons of garlic and a bag or two of onions [on a washable tv tray] while watching Discovery Home or Food Network. Then I go in the kitchen and wash them. I put whole garlic cloves in a zip lock freezer bag and toss them in the freezer. I cut my onions into quarters and put them in a zip lock freezer bag. Same thing with tomatoes, or I will take a bunch of fresh mushrooms, clean them, and freeze them also.

Other times, I will clean a whole bag or two of celery, and cut them into sticks. Into a freezer bag they go. I seed green or whatever kind of pepper I like, and freeze them in a freezer bag.

I will peel a bag or two of carrots, blanch them, and freeze them also, or pumpkin, or cabbage, or whatever.

Then, if I decide I want to make soup, or stew, or anything that needs any of these ingredients they are right at hand, without an ounce of effort on my part.

I don’t even defrost them. I take out however much I need for the meal and return the rest to the freezer. If I have to chop or slice them, I just run a little warm water on the vegetables in a colander, and then chop or slice them. It does not matter if they are still a little frozen inside, or they are not crisp; if you are cooking with them.

Every other week or so, I try to do some prep work ahead of time. I even will grate oranges, or lemons and freeze that for recipes that I might want to use.

Today, I will peel and core and slice a basket of pears I received as a gift, to freeze for a dessert later on.

I keep a ziplock of veggie peels and scraps, mushrooms, herbs, etc. and use it to make stock.

I freeze wine in cup portions or in ice cube tray.

I freeze leftover tomato paste in small portions.

I freeze chicken breasts or pork chops in brine, that way they are already tenderized when I need them.  A quick defrost and wash, and they are ready to cook up succulent and tender.

If you are squeezing citrus fruit for juice, but don't need the zest or peel at the time, remove it anyway and freeze it for later use. Use a zester or a vegetable peeler to remove the skin, not the pith.

Or, place strips of zest from a orange, or lemon, or lime in a canning jar, and pour vodka over it to cover. Mature in a refrigerator for 6 to 8 months, add the vodka to drinks, or stir a tablespoonful into desserts such as fruit salad, ice cream, or chocolate mousse.

Or add the citrus strips to a container of sugar and store for at least 3 days before using for a citrus flavored sugar.
 

Dry leftover bread to make bread crumbs in the oven till completely dry. Crush them either by hand or in a food processor. You can either freeze them - they will keep up to 6 months; or store them in a jar for about a month.

Or make croutons for stuffing by cutting the bread in cubes before lightly oiling/buttering and then drying them. I like to freeze these because of the oil and add chopped fresh herbs, chicken bouillon granules, chopped onions, and chopped celery. You have stuffing already made to use for your steak roll, your chicken or turkey, or your pork chops.


If you have to make one pie crust, why not triple or quadruple the recipe, and freeze the rest for later use.

Just remember:
Pie crust dough freezes better in a ball than rolled-out dough. A ball takes up little room in the freezer and it won't be broken when you shove in another half gallon of ice cream. Wrap the dough tightly in plastic wrap. Thaw at room temperature, in the plastic to prevent it from drying out, until only slightly chilled. Proceed with your pie.

I do the same thing with biscuits. I make tons of them, and freeze them on a cookie sheet. Then I place them in bags for the freezer. When I want a couple for breakfast, that is all I take out. I let them thaw a little [maybe 20 minutes or so] on top of the pre-heating range, then bake them.

I had just taken the bag out of the freezer. I put them on an un-greased cookie sheet and set them on top of the range. At about 6:30 or so, I pre-heated the oven.

They were tender, golden, and rose nicely. I think because they are cold when going in the oven, they bake a few minutes more [I bake them at 475], but they are great.


My buddy
Mixfinder says:

"Sunbeam waffle maker grids are preseasoned when new. High temperatures and caustic cleaners remove the seasoning.  All commercial restaurants heat waffle irons in the open position so any seasoning on the grids doesn't carbonize or turn black.

In my own experience I always make waffle batter from scratch and always use a melted fat either butter or shortening. Oils carbonize at lower temperatures and don't release as easily as solid. Waffle mixes are far too light in texture to trust coming out in one piece. One can douse the iron with grease or spray but it makes the waffles blotchy and they don't crisp without direct bond to the grids.

When I truly need to clean the grids on a waffler I buy junking, they go directly into the self cleaning oven. Afterwards I brush them with melted Crisco and bake them at 250 for an hour. Then as the final installment I mix flour, water and shortening into a batter and bake it in the newly seasoned grids until the puck is quite browned. It won't stick because it has no leavening.

Then from that moment on, heat the waffler open and make waffles from scratch using melted butter. You'll never have a sticky or dirty waffle iron again."


VINTAGE AQUA GLASS KITCHEN STORAGE

Pourable storage container.
This requires a bit of forethought, but if you save the top of your salt container (the kind with the pop up metal spout) and cut it to fit the inside of the screw on canning jar lid ring, you’ve got a canister you can pour things out of, like a cinnamon and sugar mixture for your morning cereal or coffee.


Shaker for liquid mixtures.
Whether you are mixing corn starch and water for a gravy thickener, or letting the kids shake some cream to make butter for a fun at-home science experiment, having a couple of different sizes with lids can make sure you always have a container on the ready.


Leftovers.
Send a guest home with a quart of spaghetti sauce or use it to transport soup to an elderly shut-in. They seal up well, and people can always use them for any of the other ideas on this list


SPROUTING JARS/FLOUR DREDGER

 A fine sprouting jar mesh lid on an vintage aqua mason jar makes a fine dredger!


SPICE JARS
I like to use ½ or one pint aqua canning jars for spice storage. I found a two tier carousel which is a fantastic jar organizer.


Julia Child's Hints

.
"Keep the items you use most often close at hand.

Julia stored oil and vinegar right next to the stove. Whereas, fancy silverware and china was stored outside of the kitchen.


Group like with like.

Don't keep all your tools in one big jumble, break them into separate containers: one for forks, one for wooden spoons, etc.


Label things!

Julia's kitchen labels were both practical and comical. She marked jars of utensils with phrases like "spoonery" and "mostly wood."


Get back-to-basics.

You only need three knives: A good chef's knife, a paring knife and a bread knife. Store them on magnetic strips like Julia to save precious drawer space.


Think vertical.

Julia and Paul built vertical storage to store baking sheets and other trays.


Not everyone is perfect.

Even Julia had a "junk" drawer in her kitchen, which contained, among other things, WWII memorabilia and a champagne stopper in its original box with a note from "Jim Beard" aka the James Beard. (I like to think that the box managed to survive because it was only a very rare occasion on which Julia would not finish a whole bottle of champagne.)

And of course, the famous peg-board -- everyone loves the peg-board! Julia's husband Paul came up with this idea to store her pots and pans, and home cooks have been copying it ever since."